Creating Approval Workflows
For the purposes of creating approvla workflows. These instructions assume that site specific content creators have already been created as well as site specific content approvers. If not, please see Site Specific Content Creators.
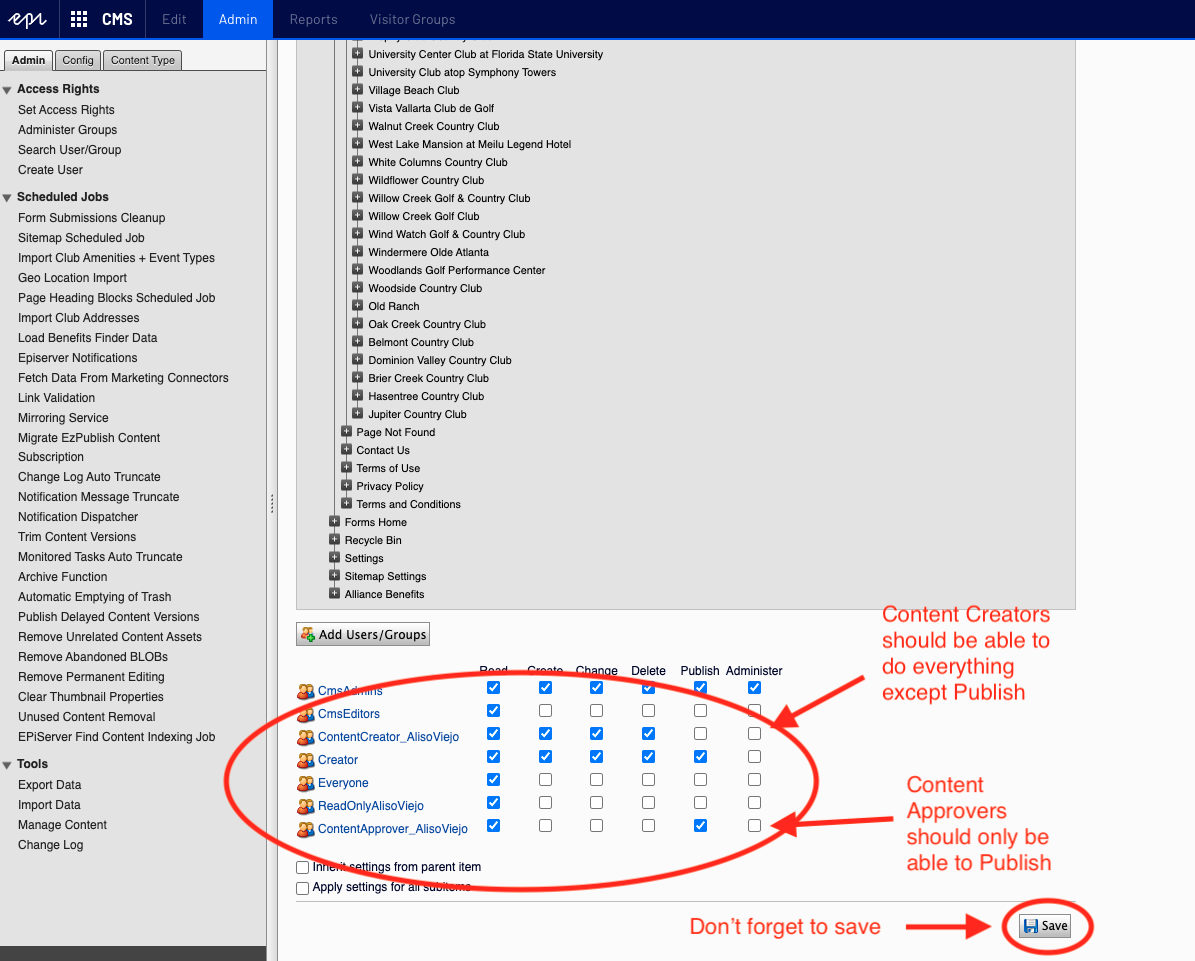
1. Click on "Set Access Rights" and verify that the content creators and the content approvers have different access (as follows)...

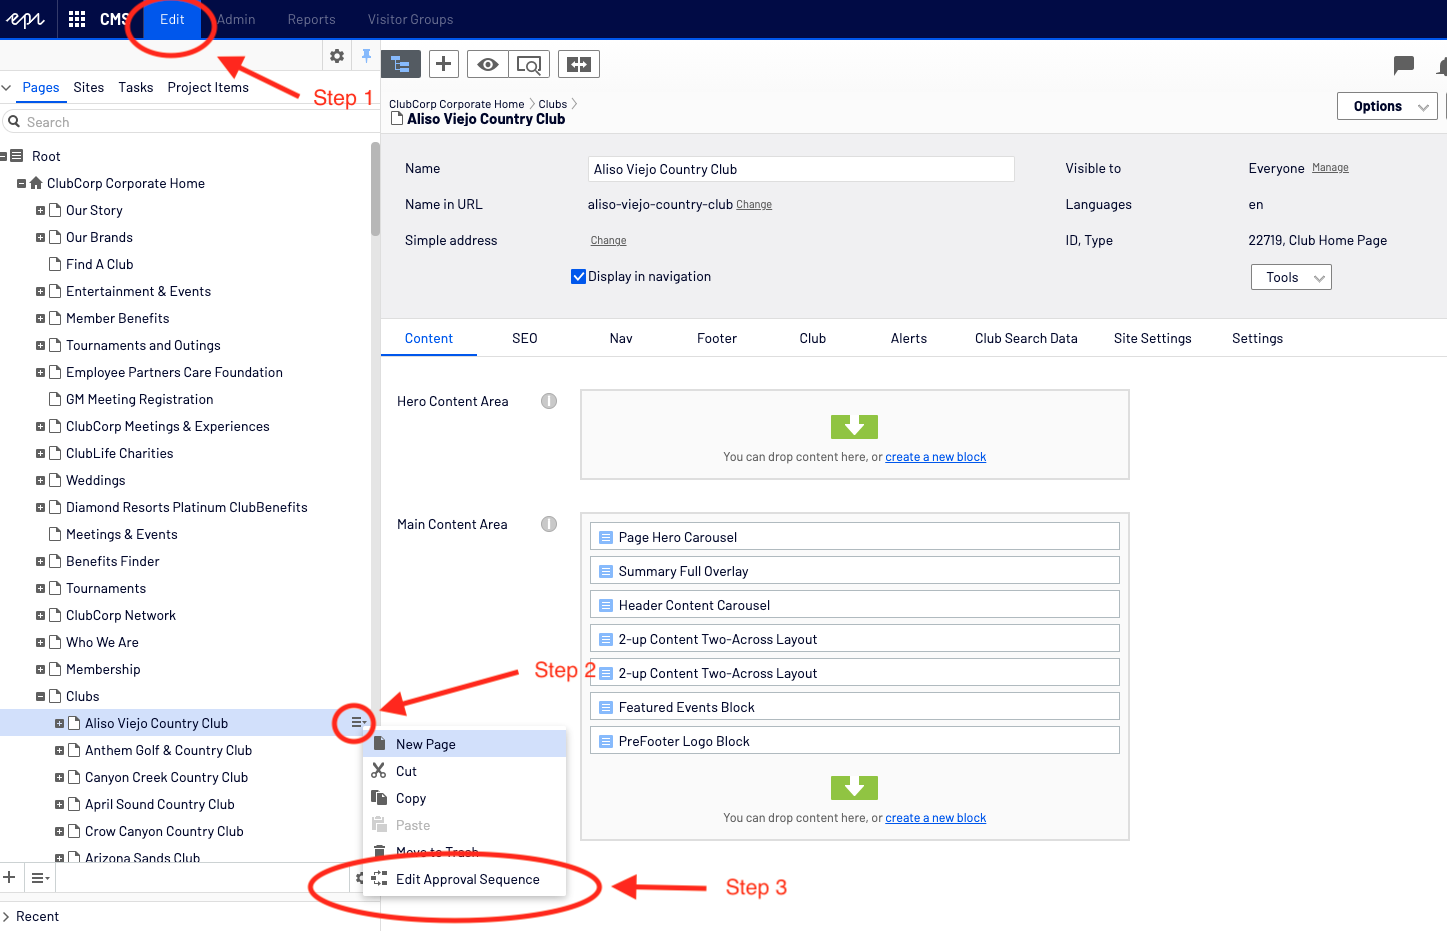
2. Go back to the "Edit" tab in EpiServer, and scroll down to the site for the intended workflow. Then, click on the hamburger to the right of the club site and click "Edit Approval Sequence".

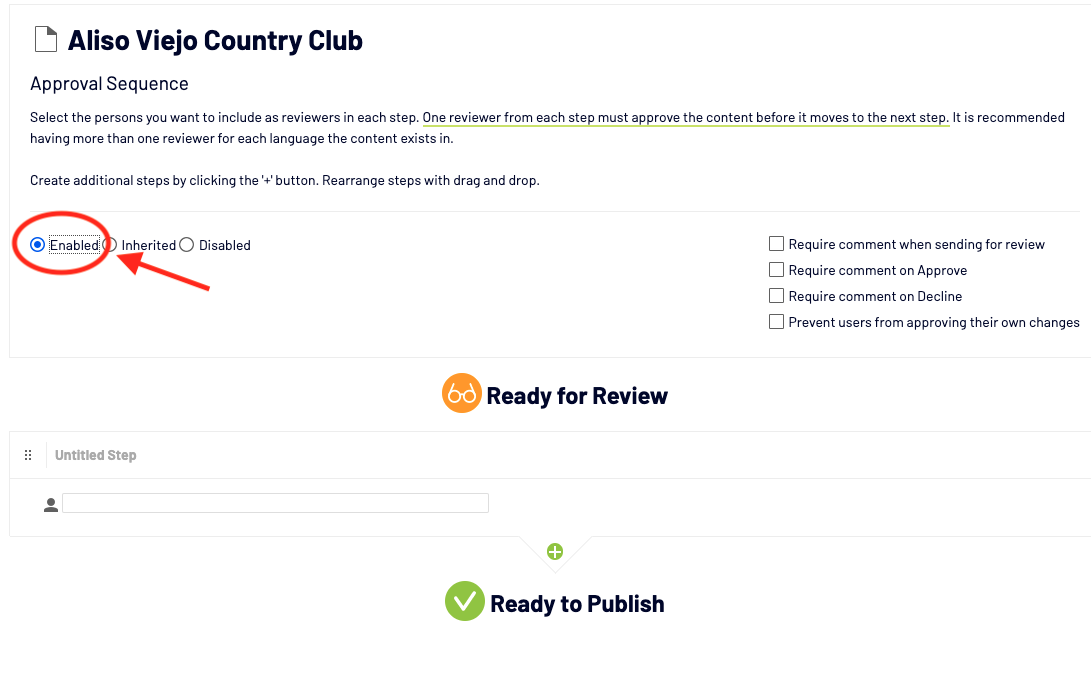
3. You should now see a Approval Sequence builder. Click "Enable" to build a site specific workflow.

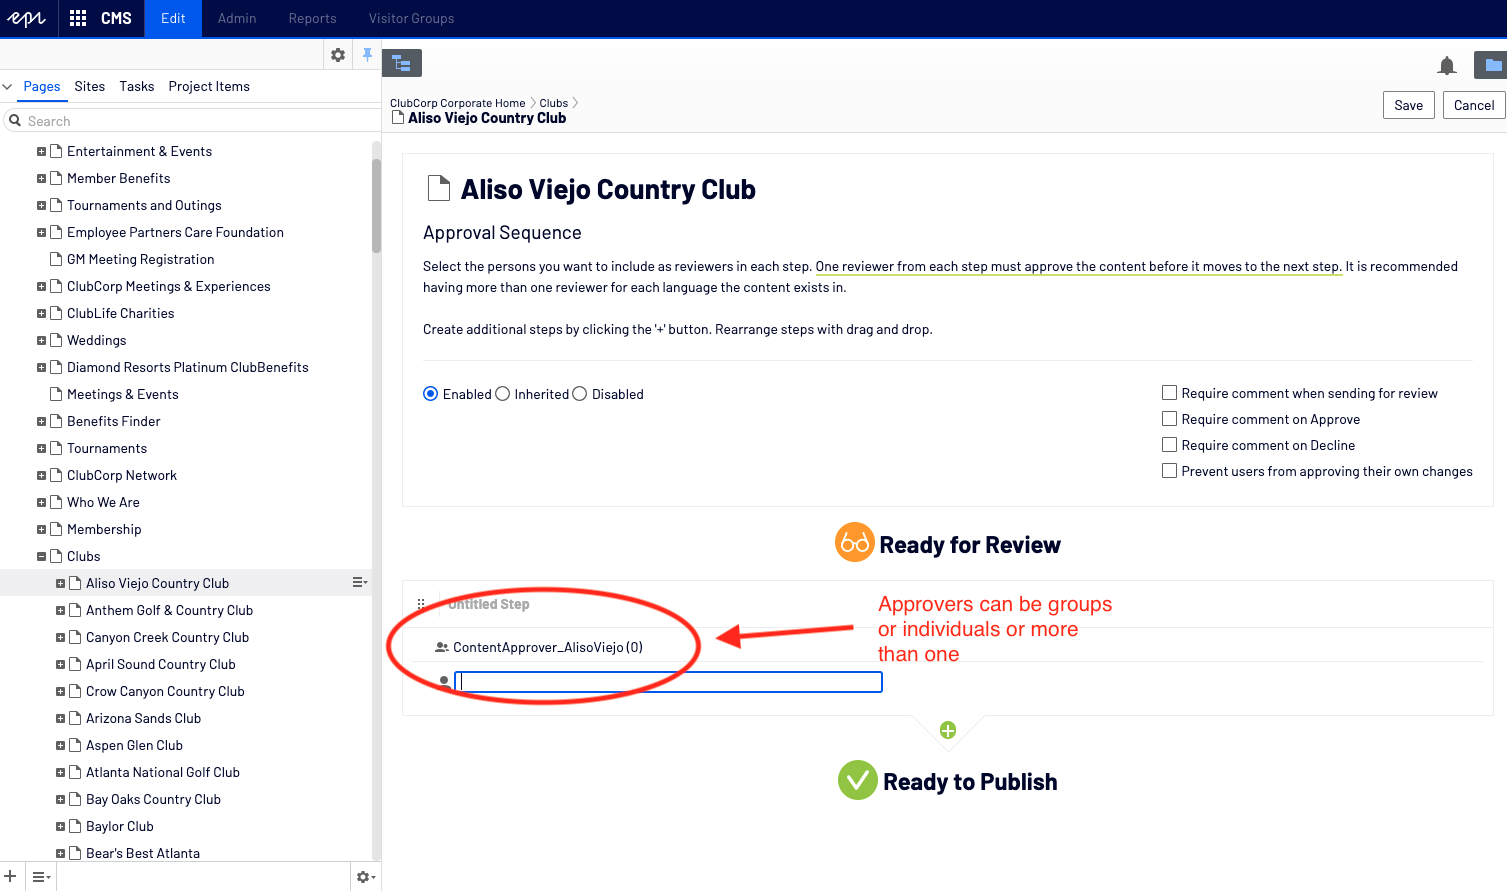
4. Add the appropriate approvers for the site. Assuming the existence of a Site Specific Content Approver group, start typing the name of that group into the empty box, and the group will appear. Select the group, and click save in the upper right. The approval has been created.

5. Now that you have an approval process, the content approvers will be notified via email and on-screen notifications (please have users check their junk mail to make sure the automated email wasn't filtered). Once the content approver is notified, they can go to the site and do an on screen comparison before approving and publishing.

